


No Regrets: My Five Best Reno Moves
I'm sharing the highest impact, best design investments I made in our [light touch] home renovation.
Knee deep in organizing my home improvement goals for the year (examining every pain point under a magnifying glass), I needed to step back and take stock of what’s working well in our home. Tonight I’m sharing the home design choices and investments that I’m happiest with, made two years ago during the light (three-month-no-walls-moved) renovation of our Manhattan apartment post-purchase. For the purposes of this exercise, I left aside paint, wallpaper, furniture, fabric, window treatments, art, and accessories. Instead I focused on the elements that will/should last longer than any redecorating or medium-term wear and tear. While the intention of this post is to be more of a home design gratitude practice, I’ve also noted related mistakes/learnings and long-term goals should they be helpful.
[All of these renovation moves were brought to life by my friend and interior designer Sarah Lyons and executed with great attention to detail by our contractors, Toka. Highly recommend them both!]
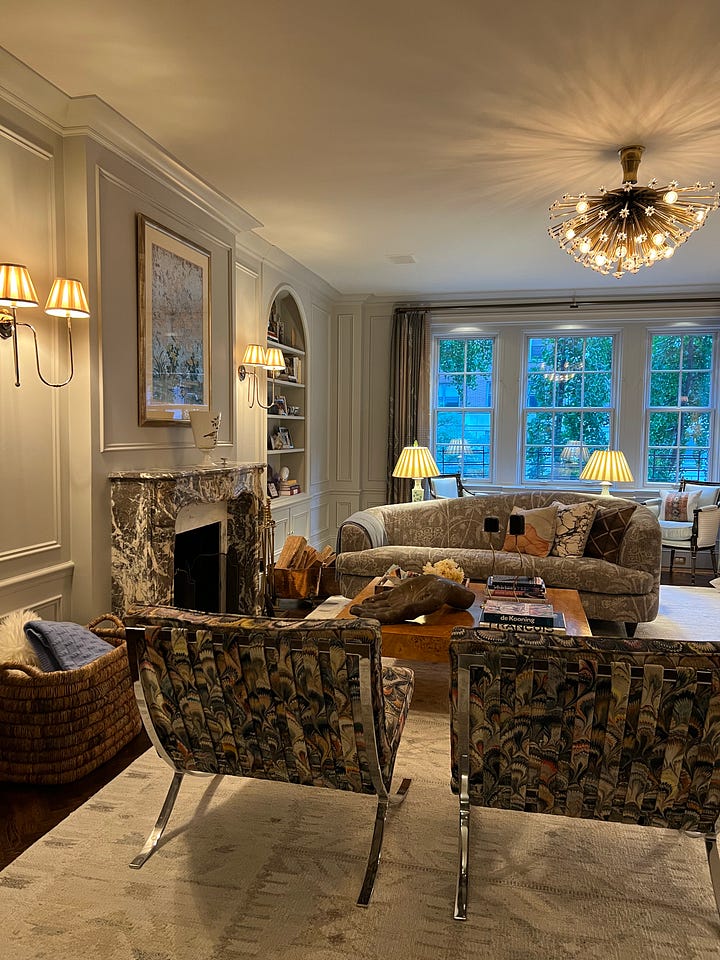
Upgrading the Mantle

A detail of our mantle, moulding, and sconces shortly after installation. For the love of brownstones and all that is Gilded Age New York glory, I wanted a home with a fabulous fireplace. As luck would have it, the cover image of the listing for our Upper East Side apartment showcased a living room with a wood burning fireplace (bingo!), though the quirky wood mantle with dentil moulding wasn’t exactly what I had in mind. No problem — I was familiar with the concept of BYO. Sarah sourced an 18th Century Louis XV Gris de Ardennes marble piece from France that fit perfectly, and I have never looked back. We had it installed with remnant stone slips [I’m so, so on these TBH, but we chose from what was available at the stoyeyard at the time and, overall, I think they work fine]. To complete the look, we styled the hearth with an antique fire screen and tools.

Before (left) and during (right) demolition and remodeling. Note work to the hearth, moulding, and crown, in addition to light fixture changes. 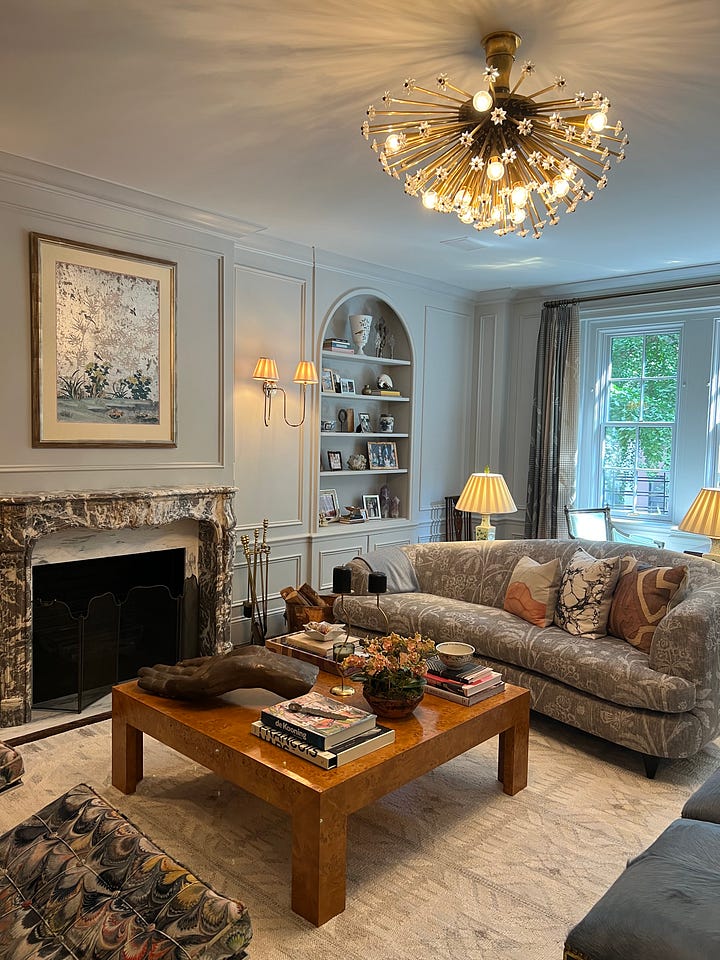
Our living room this winter, still a WIP. [For similar Louis XV mantles, see this, this, and that; you will find a world of marble mantles online in a true range of styles and price points (think $3,000-$300,000, with most falling in the $5,000-$25,000 range).]
I love the piece of antique Japanese wallpaper I have framed over the fireplace currently (a gift from my mother years ago), but I would like to replace it with an oversized mirror and move the framed piece elsewhere. A mirror will visually extend the room, open up the mantle to styling (think large vase with flowers) without feeling cluttered, and avoid smoke damage to a work of art. This is a shopping list item for 2025.
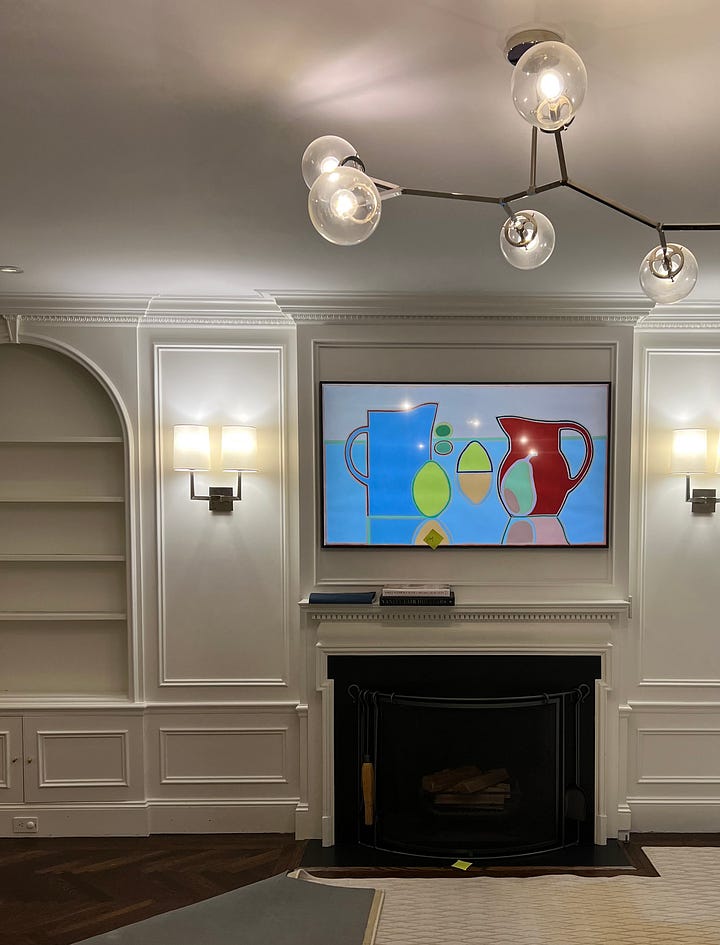
Cleaning Up the Moulding
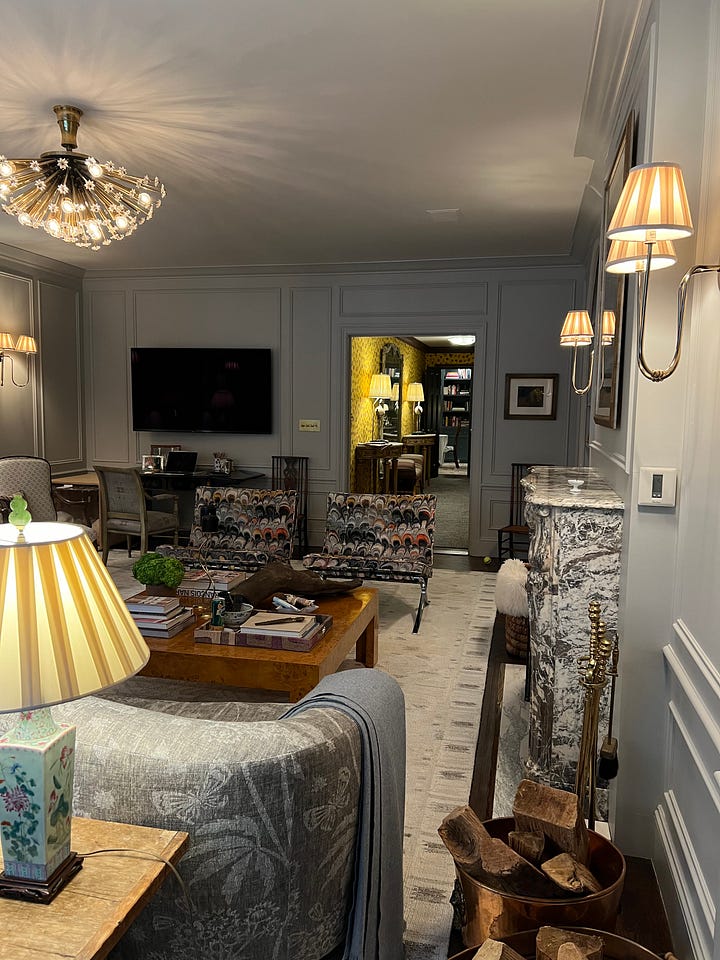
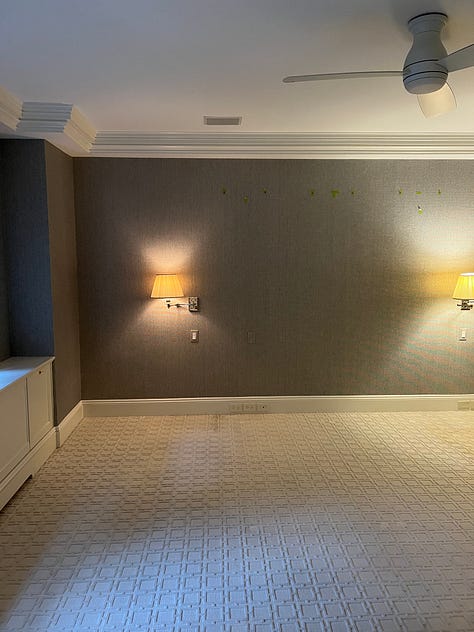
Before (left) and after (right) of our living room moulding looking through to the foyer. The existing home had a hodgepodge of crown mouldings — large and thick in some rooms, small and simple in others, and rooms with no crown moulding at all. The kitchen had crown moulding on the cabinets, but not the adjoining walls. The living room was comprised of many mouldings combined together, including ornate adornments over doors and archways. Attempting to tidy up with a light touch, I determined to keep some of the existing mouldings and picked a medium size simple profile to apply to nearly all the rest, even atop the existing kitchen cabinetry. [Note that moulding is something you can generally pop off and replace.] Thankfully the baseboards were relatively uniform throughout the home. I skipped crown moulding altogether in a few places — two bathrooms and the laundry nook.


A closer look at the process which included removing the folding doors, moulding ornamentation, replacing the crown, reinforcing walls, and more. The real surprise work in this category crept up in the living room. I initially intended to take off what I saw as over-the-top ornamentation and ended up largely overhauling the moulding detail all around due to quality issues we discovered in demolition. This was money I hadn’t planned to spend [who hasn’t experienced some version of this in a renovation?] and I paused here; but this subtle reshaping of a central space in the home truly increased the elegance I perceived. 100% worth it IMO.
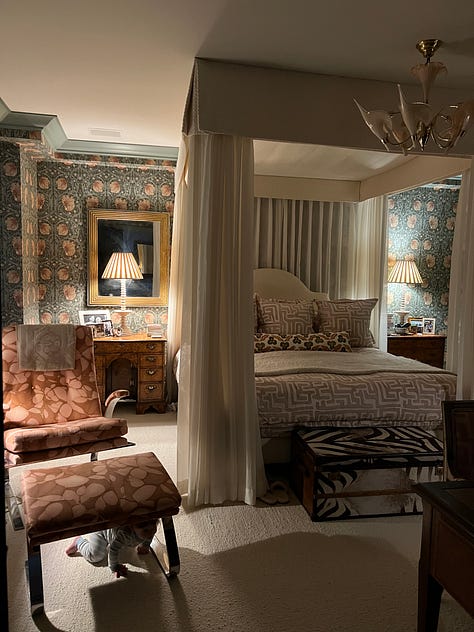

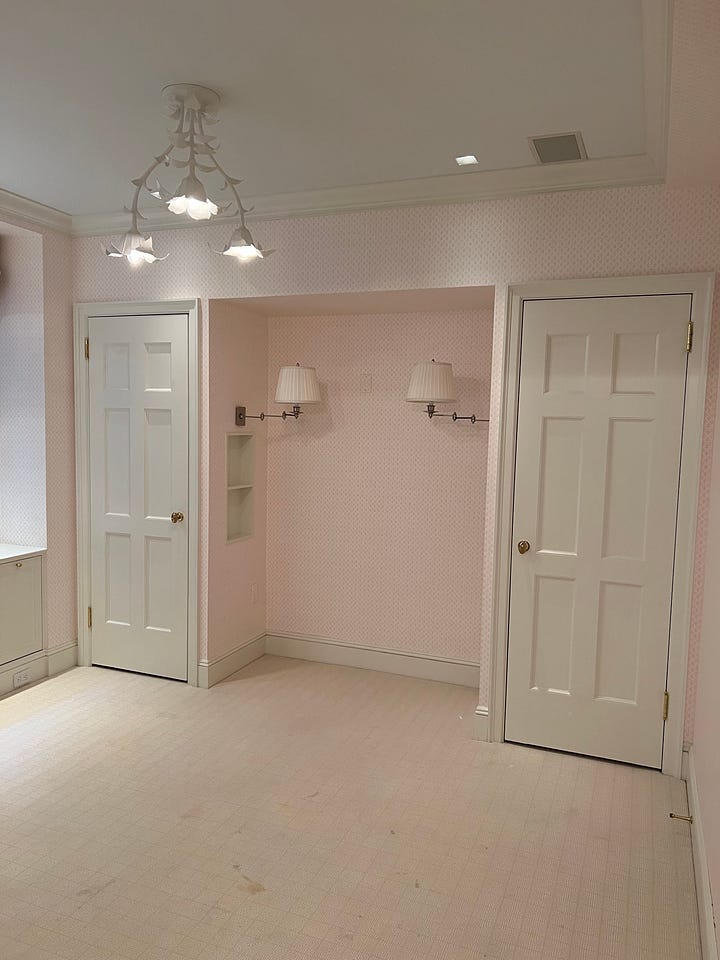
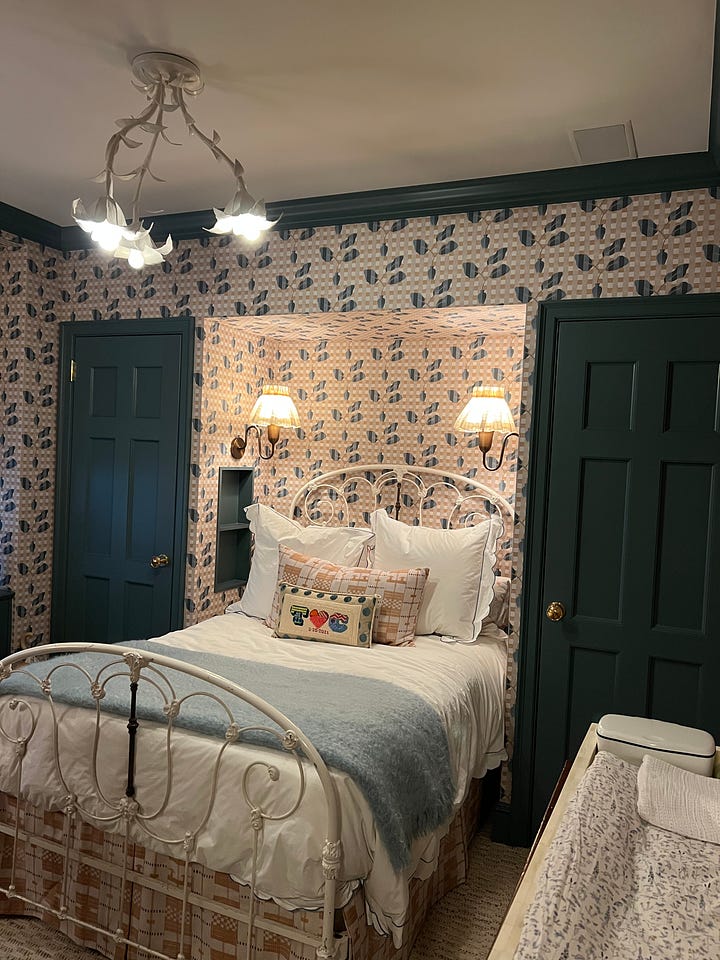
Before (left) and after (middle) of our bedroom. This example was the thickest, heaviest moulding in the home. The soffit is functional and can't be removed (we tried), but wallpaper over it elongates the walls, seen in the detail (right). In the category of architecture that drew me to the place, but really needs to go (or be overhauled in some other way I haven’t yet imagined) are the arched bookshelves flanking our living room hearth. Not only are these shelves too shallow to be functional, but one is noticeably deeper than the other. Taking these out altogether was over budget, so they are currently a Five Year Goal [more on this in a future post], but if anyone has an idea around how to make them look chic and not cluttered in the short term, hit me up! Styling (and restyling) these fraternal twins is the current bane of my home design existence.
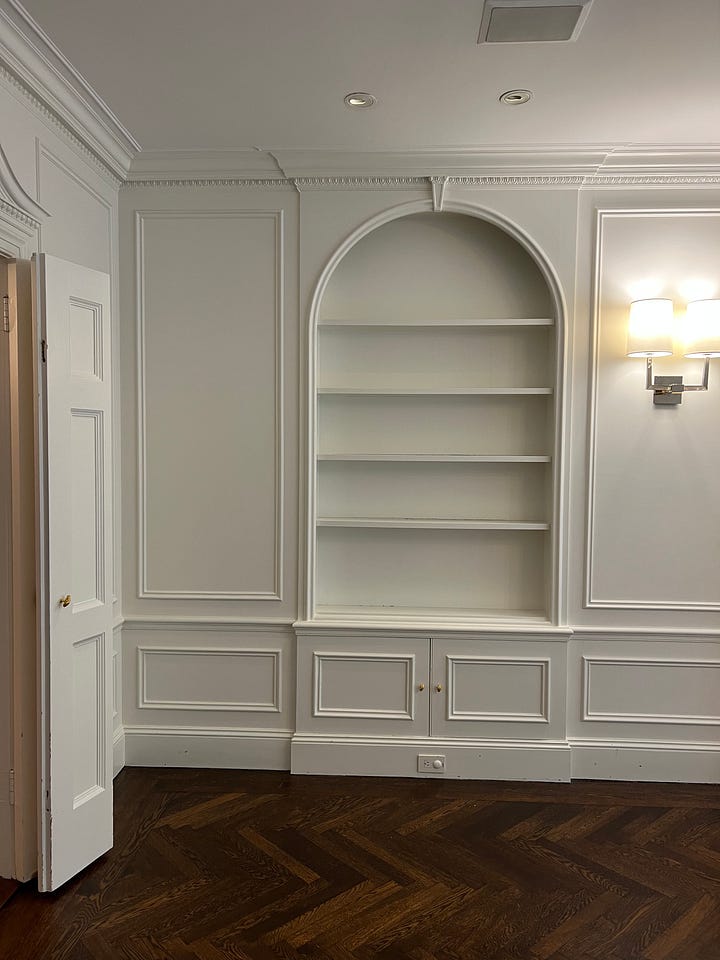
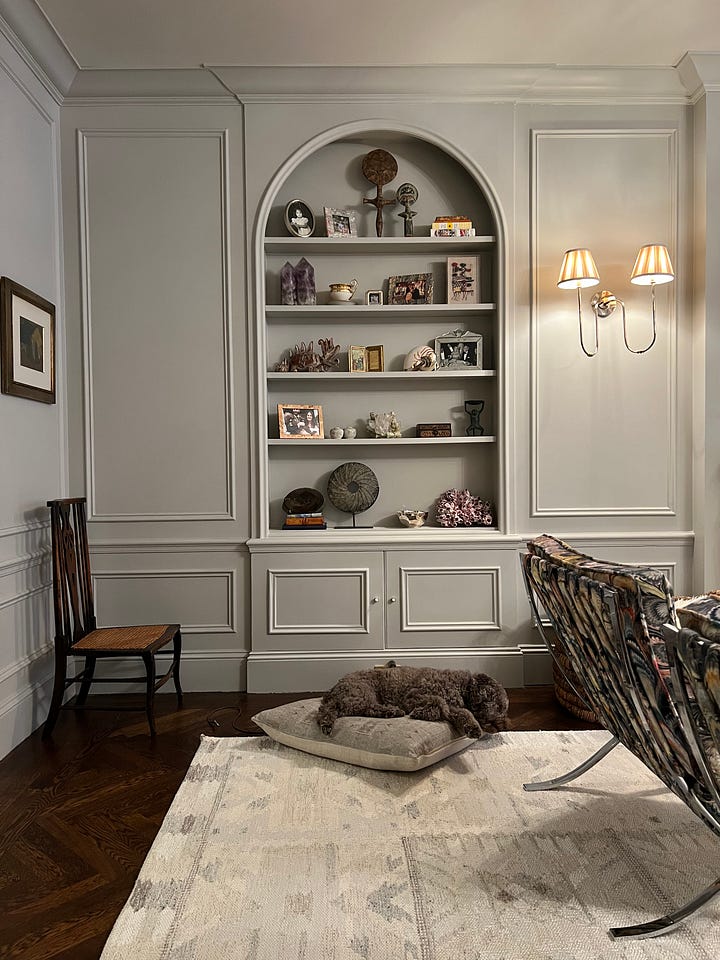
Before (left) and after (right) of the living room shelves I struggle to style. Note the subtle millwork, hardware, and lighting changes. Painting Our Back-of-House Floors

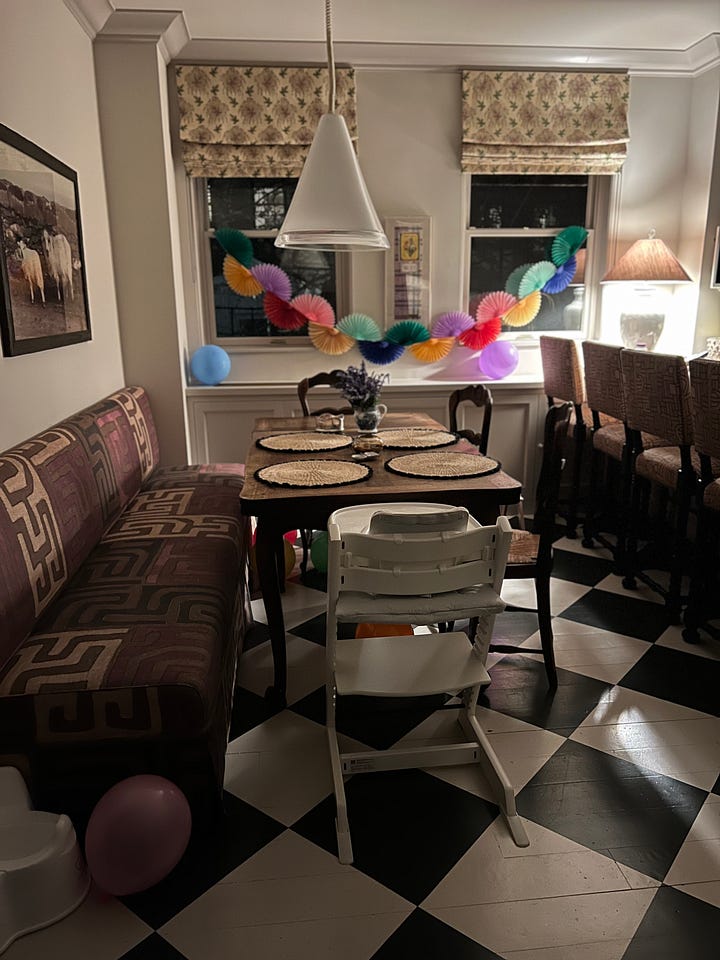
A detail of our kitchen floors in daily use (left) and for special occasions (right), along with live action (below) of my three-year-old chased by our dog while eating pasta from his breast pocket. As a long-time fan of painted checkerboard floors (the traditionalist in me!), I wanted this feature in my home. Enter our inherited wood kitchen floors, which were visibly worn. Rather than refinishing, we hired a decorative painter to create a Skimming Stone and Studio Green (satin finish) checkerboard floor that stretches through the kitchen into the laundry nook and guest hallway. This statement-making foundation of the space has proven a memorable backdrop to toddler food fights, falls, and dance parties. The ever-so-slight wear adds to the cozy cottage feel of this area of our home.


Walking through the apartment post-purchase (left) and living in it 9 months later (right). Peep the new cabinet knobs, shown in detail later. At that time we were still waiting on unlacqured brass window pulls. Another long-term goal of mine is to refinish all the wood floors in our space — at minimum, the entry way, dining room, and living room. My desired finish is still TBD. This was an item I cut from the original scope as they are largely covered by rugs and in an I-can-live-with-them state. Put ‘er on the Five Year Goals.
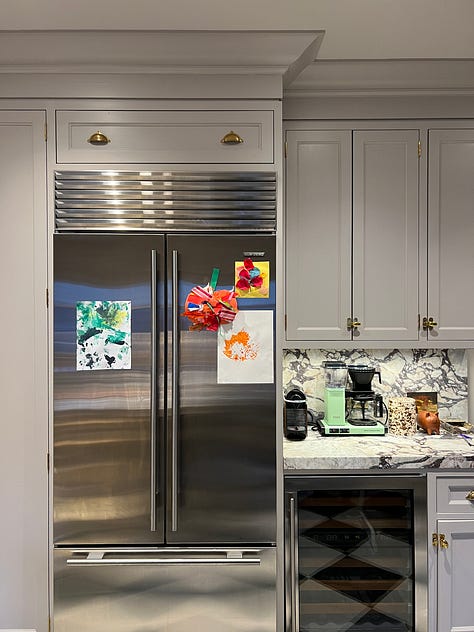
Installing New Kitchen and Laundry Countertops
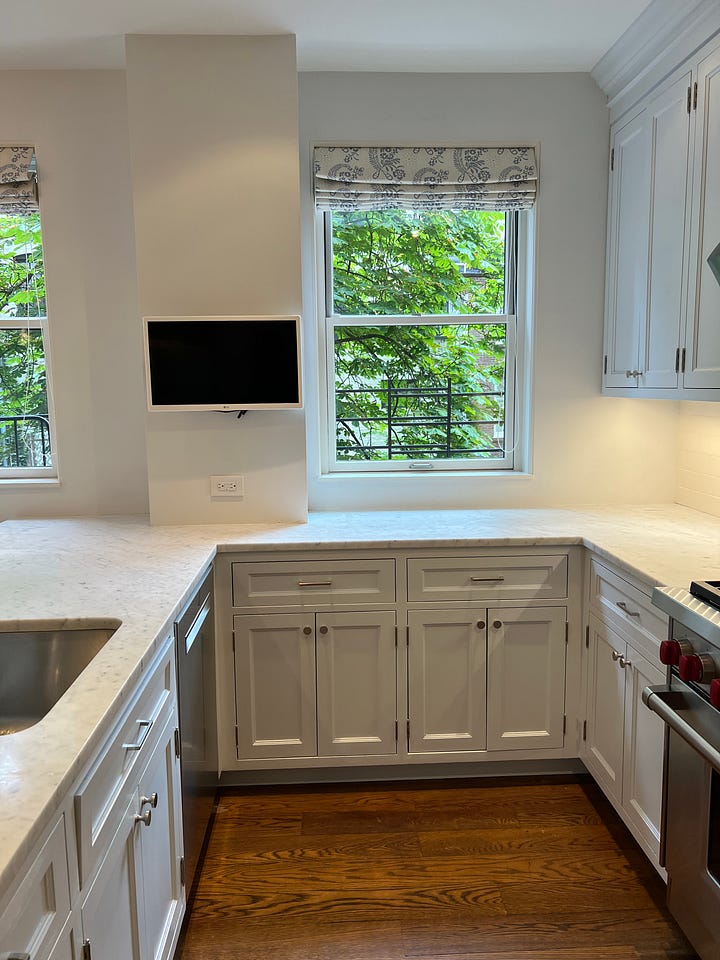
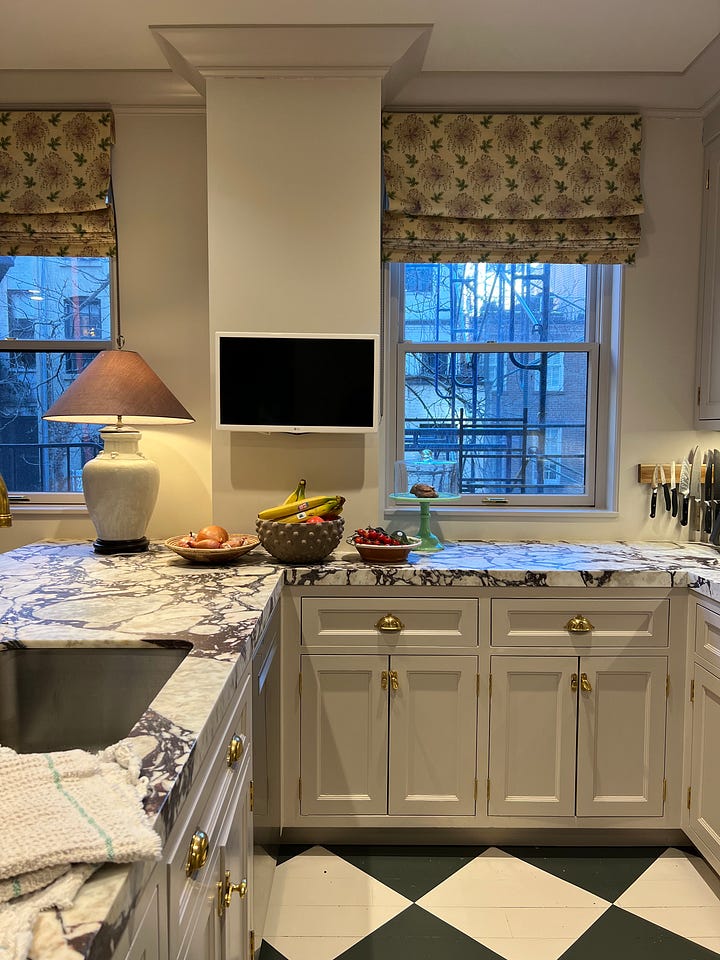
Post-purchase Fall 2022 (left) to today (right) with many a before-and-after to note, but as it relates to today's post: countertops, crown moulding, millwork and window hardware, and painted floors. A theme of kitchens I’ve earmarked over the years is statement-making marble countertops, often with a purple undertone. Surveying our new kitchen, I wanted to change the look — both the stone and the depth of the slab itself (bumping it up to two inches). We were extra lucky with a remnant stone piece that was big enough to extend the marble to the kitchen backsplash and the adjoining laundry nook, which we were otherwise planning to tile.

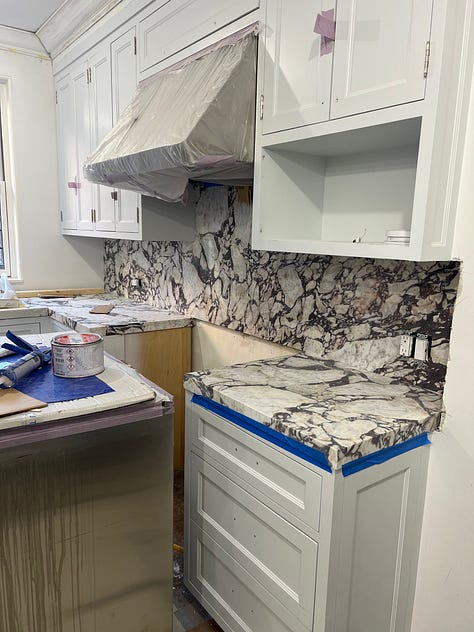
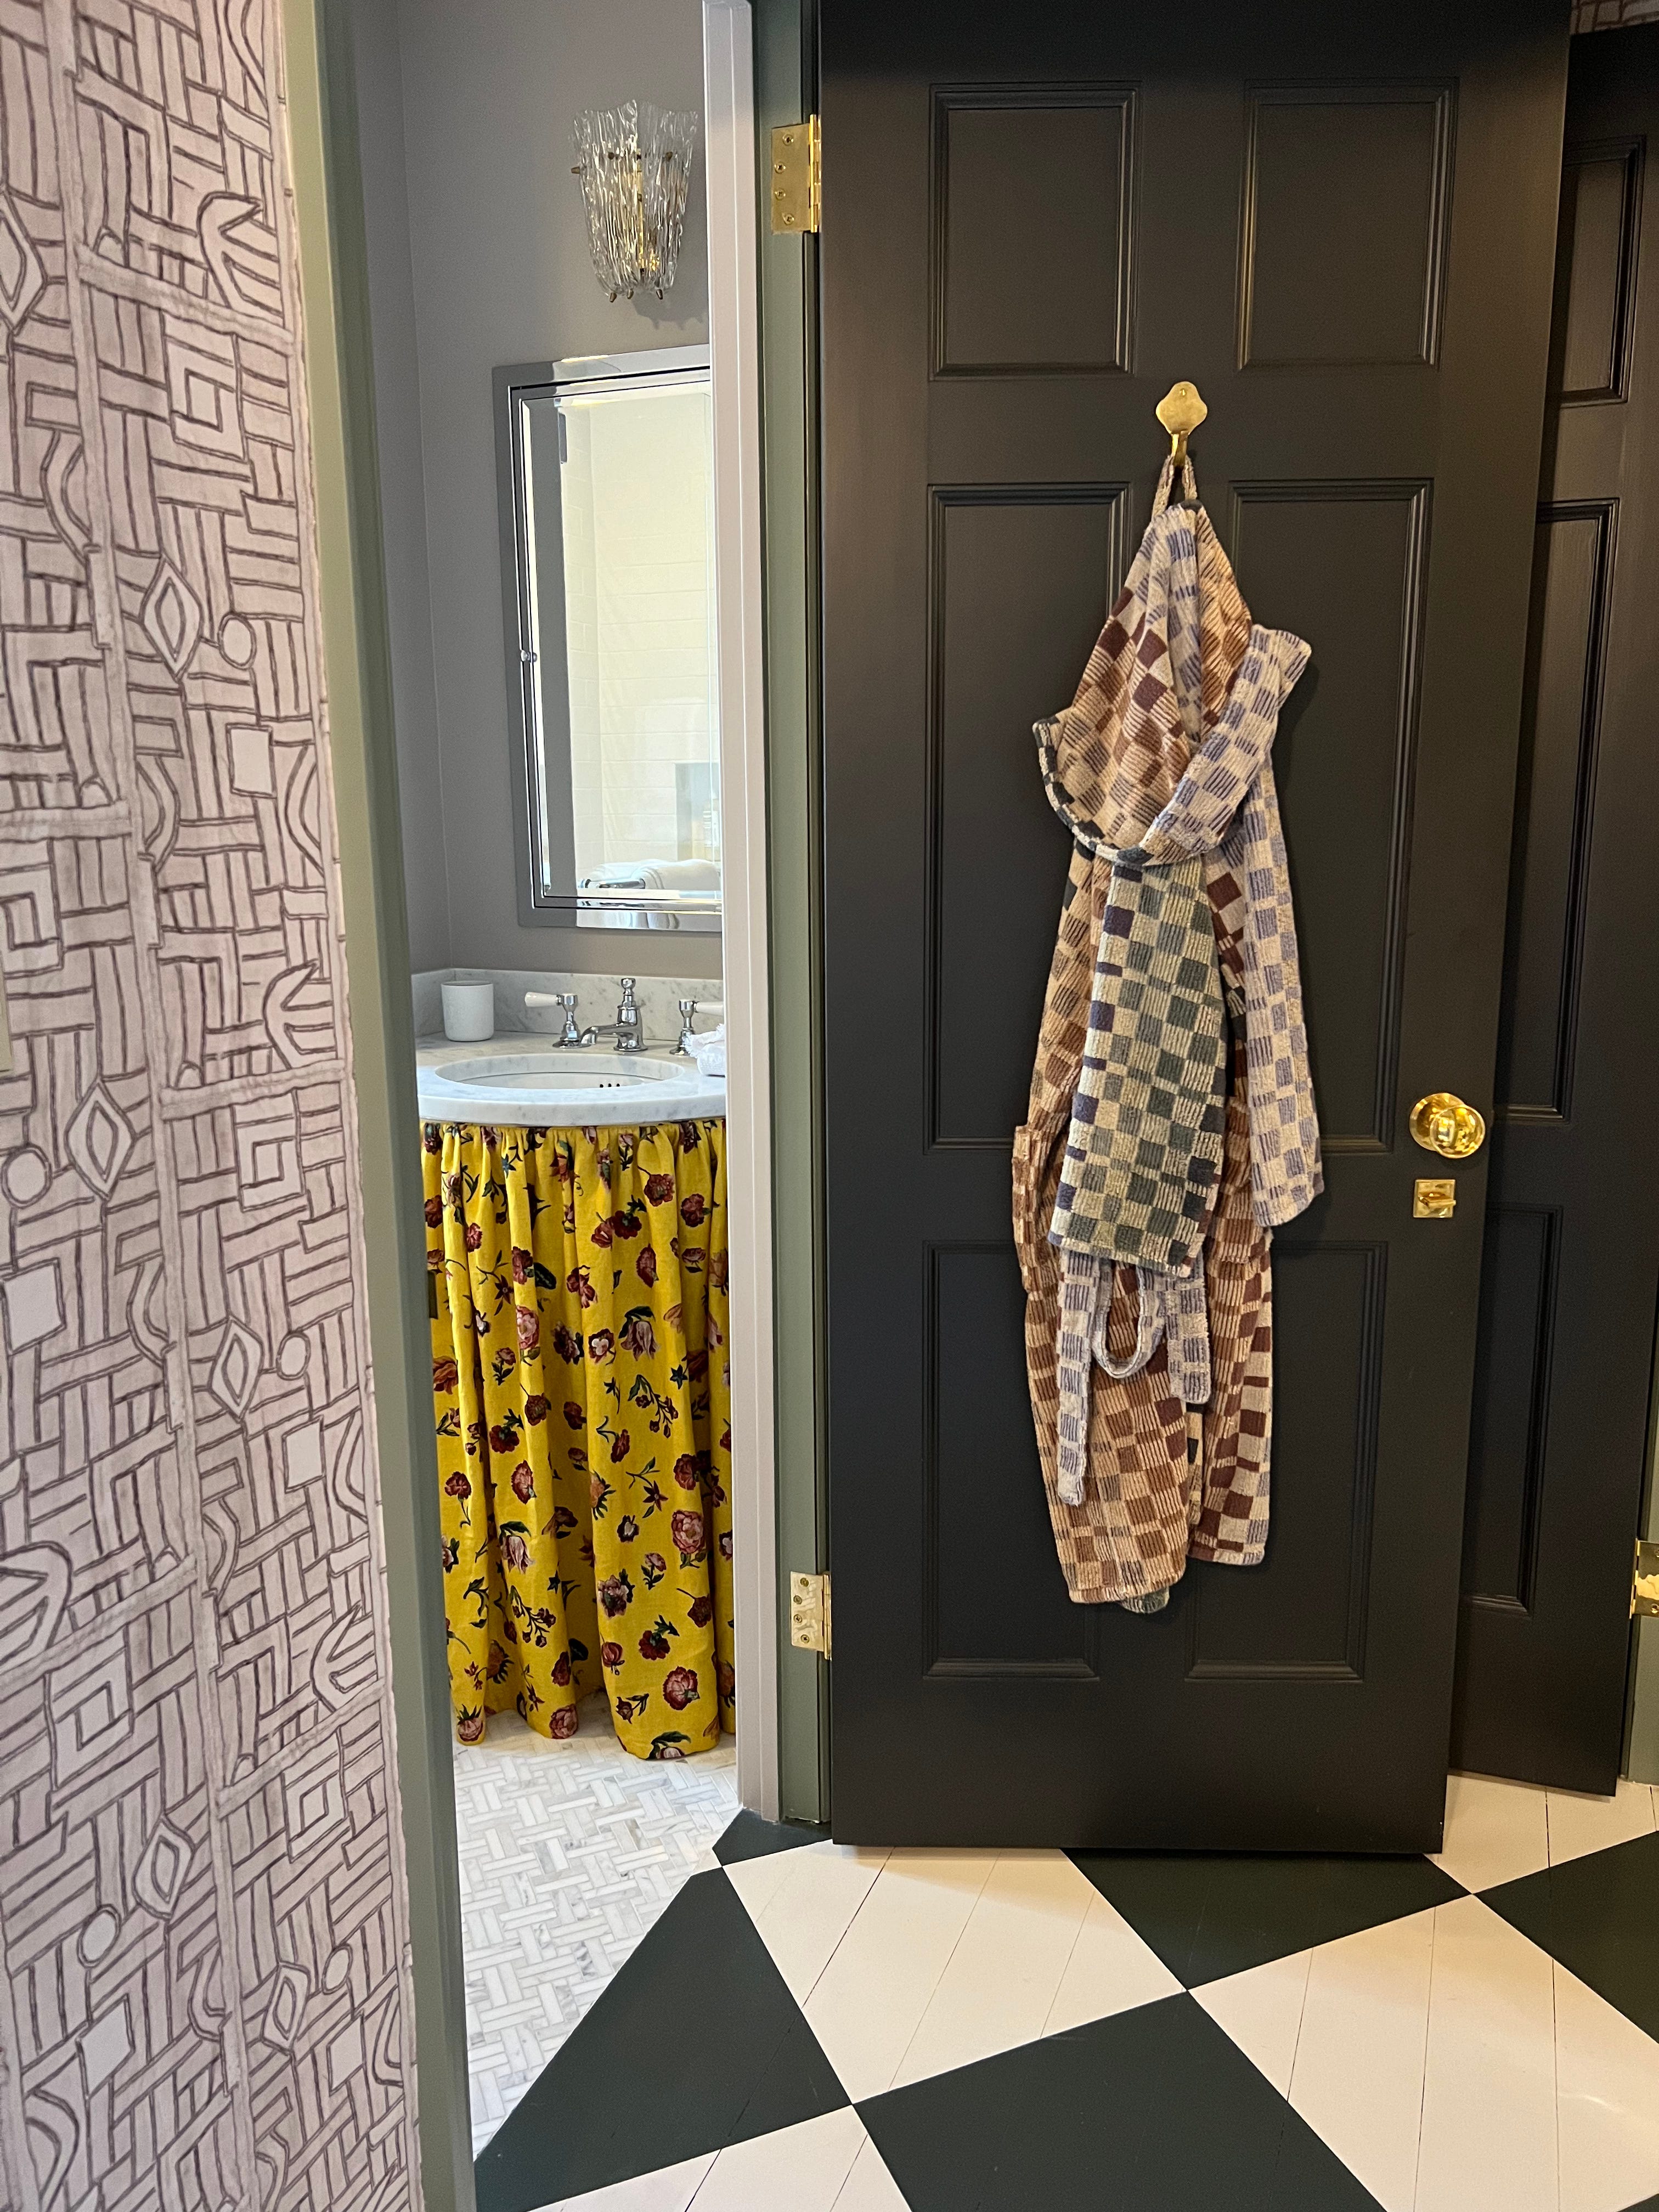
More of the kitchen before (left), after (center), and installation (right). Related: when we purchased our place the bathrooms were newly renovated. But they were not finished in a way that I would have done them myself. After seeing the transformation the stone made to our kitchen, I would still love to update these one day (and their chrome fixtures) — Five Year Goals. This wasn’t even close to being in budget or justifiable initially. I also have to admit that living with the bathrooms as is (granted, we changed most of the hardware, all of the lighting, the mirrors, and paint), they really don’t bother me as much as I thought they would. This has been a good lesson in trying to live with some of the choices you wouldn’t have made yourself and see what really gets under your skin before prioritizing where to spend.
Switching out the Lighting and Hardware (a.k.a the Jewelry of the Home)


Our living room this past Christmas showcasing the flush mount and sconces we brought in (left) and a detail of the living room cabinet knobs (right), which we also used in the kitchen and bedrooms. ON LIGHTING
Ignoring the surprise electrical issues we addressed, we did two things on the lighting front: removed or streamlined recessed lighting, and replaced or moved all fixtures. On the former, inconsistent lighting freckled the ceilings, most egregiously in the kitchen. We simplified the kitchen lighting for technical use and removed nearly all other recessed ceiling lights. [Read more on the importance of ambient light here.] On the latter, from the chandeliers to the sconces, these are some of my favorite features of the place. I still swoon over the 20th Centrury modern Italian brass, black, and glass oval Sputnick-style flush mount in our living room. It’s like a dreamy star explosion I’m always pleasantly surprised to see. The funky telephone cord wiring on the Italian vintage large Murano glass pendant light over or kitchen table, pictured earlier, makes me feel hipper than I am. Even the hand-me-down lights from the seller (including a floral chandelier in my daughter’s room that we repainted to match the matte white of the ceiling) bring me joy.
A more subtle example in my daughter's room: before (left) and after (right) with the same chandelier repainted, bedside lights replaced with Ahtropologie's Antique Brass Tulip Sconces and Alice Palmer shades, and recessed lighting removed. Filed under ‘Mistakes I’ve Made’ is my bedroom chandelier, pictured earlier. A pretty and feminine Italian Mid-Century Murano handblown glass number, this was one of the first light fixtures I purchased. The main reason I don’t love it in situ is that it just feels too matchy-matchy to the room. I wish I had gone for something that was more of a contrast or simply more transitional. [I am going through a thought exercise of un-decorating my apartment and this is a theme I’ll address in the future.] Anyone want to buy it? Seriously though. Assuming not, this is a mistake I can live with in the medium-term, listed on the Five Year Goals.


A hallway leading to our primary bedroom before (left) and after (center and right), including replaced lighting and pulls. ON HARDWARE
We replaced c. 95% of the hardware in our home. I’m talking every doorknob, nearly every cabinet pull, hook, window hardware, and even switchplate [does that count as hardware?]. These are places on your walls and doors and cabinetry that you not only notice visually, but also regularly touch. So to me this has a lot of impact. We went with a wide range of unlacquered brass pieces throughout, but also incorporated other materials, including bronze and horn.
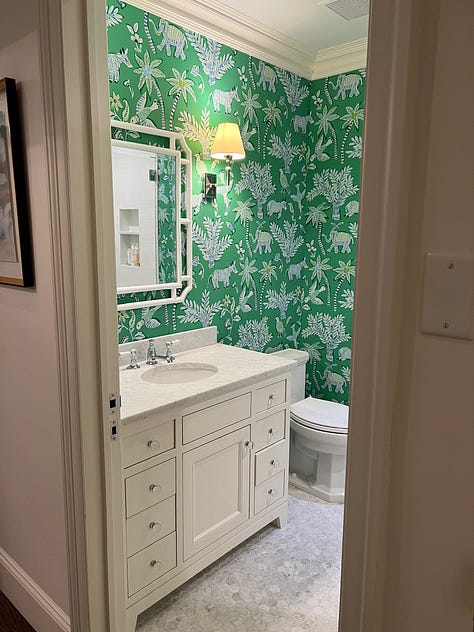


Our kids' bathroom before (left) and after (center and right), including replaced knobs and sconces. The lights are contemporary plaster clad metal with Antoinette Poisson lampshades. The knobs are porcelain bone in a beehive shape, echoed throughout our home. Another mistake I made was in selecting the doorknobs for all passageway doors. Aesthetically I am happy with the result given the price point. However, I really dislike the handfeel when opening the doors. The knobs are flat-ish and pointy on the edge and kind of hurt to turn [maybe I’m just a weenie?]. Anyway, this is definitely a mistake I can live with and replacing these does not even make the cut for my Five Year Goals.

A peek into our powder room, featuring the aforementioned painful if pretty doorknob, replaced sconce, painted floors, and I-can-live-with-it bathroom tile/sink/faucet.


To my renter readers, thank you for humoring me tonight. While I understand that most of this doesn’t apply to rental spaces, I want to note that I have replaced light fixtures in my last two rentals, and was very happy with the impact on the spaces. The cost was the fixtures themselves plus an electrician to install and uninstall them, both when I was moving in and out. Keep in mind that I sold or took the fixtures with me to my next home.
To those of you who have been through a renovation, I hope you will share your best (and worst!) choices below, so that we can all benefit from your experience. If you’re currently prepping for a reno, drop your pain points and design dilemmas in the comments or chat and I’d be delighted to weigh in and hear others’ suggestions.
Goodnight and good luck!
Amen to living with things for a while before renovating/updating/spending a bunch of money. When we first bought the home we're in now (nearly 24 years ago!), we didn't have any money to spend on renovations — and thank goodness, because I probably would have knocked down a few walls and made it more open (we had a 1-year-old at the time and thought we'd have two or three more children). Once our third child was born, I realized that I loved that our long row house had lots of little rooms (instead of just a few big ones). We didn't do our first renovation until we'd been here for about eight years and by then, we knew what made sense and what didn't. Phew.
Would love to know where you sourced your hardware — it all looks gorgeous